If you’re a more serious in freelance photography, you may already know why it is not the best choice to use an “Auto†and/or “Program†mode for exposure in your camera. If you’re a casual shooter, you probably use it most of the time. In this article, I will explain why the other exposure modes are important to understand and when to use them.
Which Settings Stand for Exposure in Your Camera
Two things determine the exposure on your camera–shutter speed and aperture. (We’ll leave out the ISO setting for now.) Shutter speed is how long your shutter stays open when you take the picture. It can be very fast (like 1/2000th of a second) or very slow (like several seconds). The aperture setting is just a measure of how much light your lens lets in, as determined by the diaphragm on the lens.
Aperture settings or “f-stops†can be thought of as fractions so that a setting of f/4 lets in more light than a setting of f/16 (because 1/4 is bigger than 1/16). The combination of the f-stop and the shutter speed determines how much light hits the sensor, and therefore how light or dark the exposure.
“But,†you say, “I don’t care about that. I just set it on Auto and the camera figures out which settings to use.†And indeed it does. But if you want to have your photos look the way YOU want them to look, then you have to take a bit of control. That’s what the other exposure modes allow you to do.
Aperture Settings for the Best Practice for Freelance Photographer
The aperture setting determines how much of the picture (from near too far) is in focus. The shutter speed determines how subjects that are moving will look. Your first task, then, is to think about the photo you want to take and ask yourself if either of these things matter. If they don’t, then go ahead and use Auto or Program. An example might be shooting a picture of your house from across the street. All you need in focus is the house, and it’s certainly not moving, so go to Auto and let ‘er rip.
But sometimes it IS important to control the depth of field (amount in focus) or the motion of your subject. And that’s why you’re reading this article!

Depth of Field in “Aperture-Priority†Settings
Wide Opened Aperture
Suppose you’re taking a portrait of someone. Maybe it’s posed, maybe it’s candid–it doesn’t really matter. The important thing is that you want the person in focus, but you want the background to be nice and blurred so the person’s face stands out. The solution is to use the “aperture-priority†setting on your camera. Set a large aperture (like f/4 or even f/1.2), be sure the camera focuses on the person (not the background) and take your beautiful shots. Now you’re a professional photographer!
Small Aperture
On the other hand, suppose you’re shooting a whole family. You’re going to have some unhappy people if only one of them is in focus, so you need a big depth-of-field. That means a small aperture (like f/16 – remember the fraction idea) and you’ll get everyone sharp. If you just use Auto instead, the camera may pick an aperture of f/8, and the people in the back row will be slightly out of focus. Not good!
Shutter Speed in “Shutter-Priorityâ€
High Shutter Speed Mode
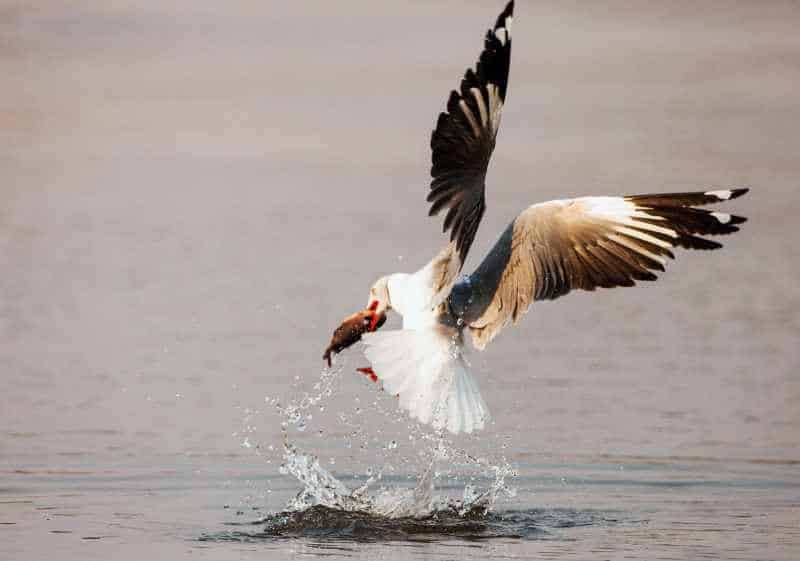
How about a different situation, like sports? As a freelance photographer, you’re shooting a guy snow-skiing and he is flying down the hill. Now your biggest issue is stopping his movement in the shot so he’s not just a blur. The solution is to use the “shutter-priority†mode and set a fast shutter speed, like 1/1000 or 1/2000. Even though the camera may now use a large aperture, you just want the skier in focus anyway, and you have to stop his motion to get the shot you want.
Slow Shutter Speed Mode
Sometimes, though, you may need a slow shutter speed. If you’re photographing moving water and you use a fast speed, the water will be frozen and not look at all like the beautiful scenes you’ve seen in calendars or postcards. Just use a slow shutter speed, like 1/2 second (with a tripod, of course) and the water turns into a beautiful misty flow.
With all that control, do you ever need the manual exposure mode? You sure do! There are two common situations, that benefit from manual exposure. Unusually light or dark scenes, and scenarios where you’re taking a lot of different shots under the same lighting.
How to Measure the Light
Average Exposure in Your Camera
If your scene is primarily dark or light, the digital camera meter tries to make it average out to 18% Gray in whatever exposure mode you’re using. If you would like to estimate your 18% Gray expose, think about the big green meadow at the cloudy day. That will be the average gray for your camera.
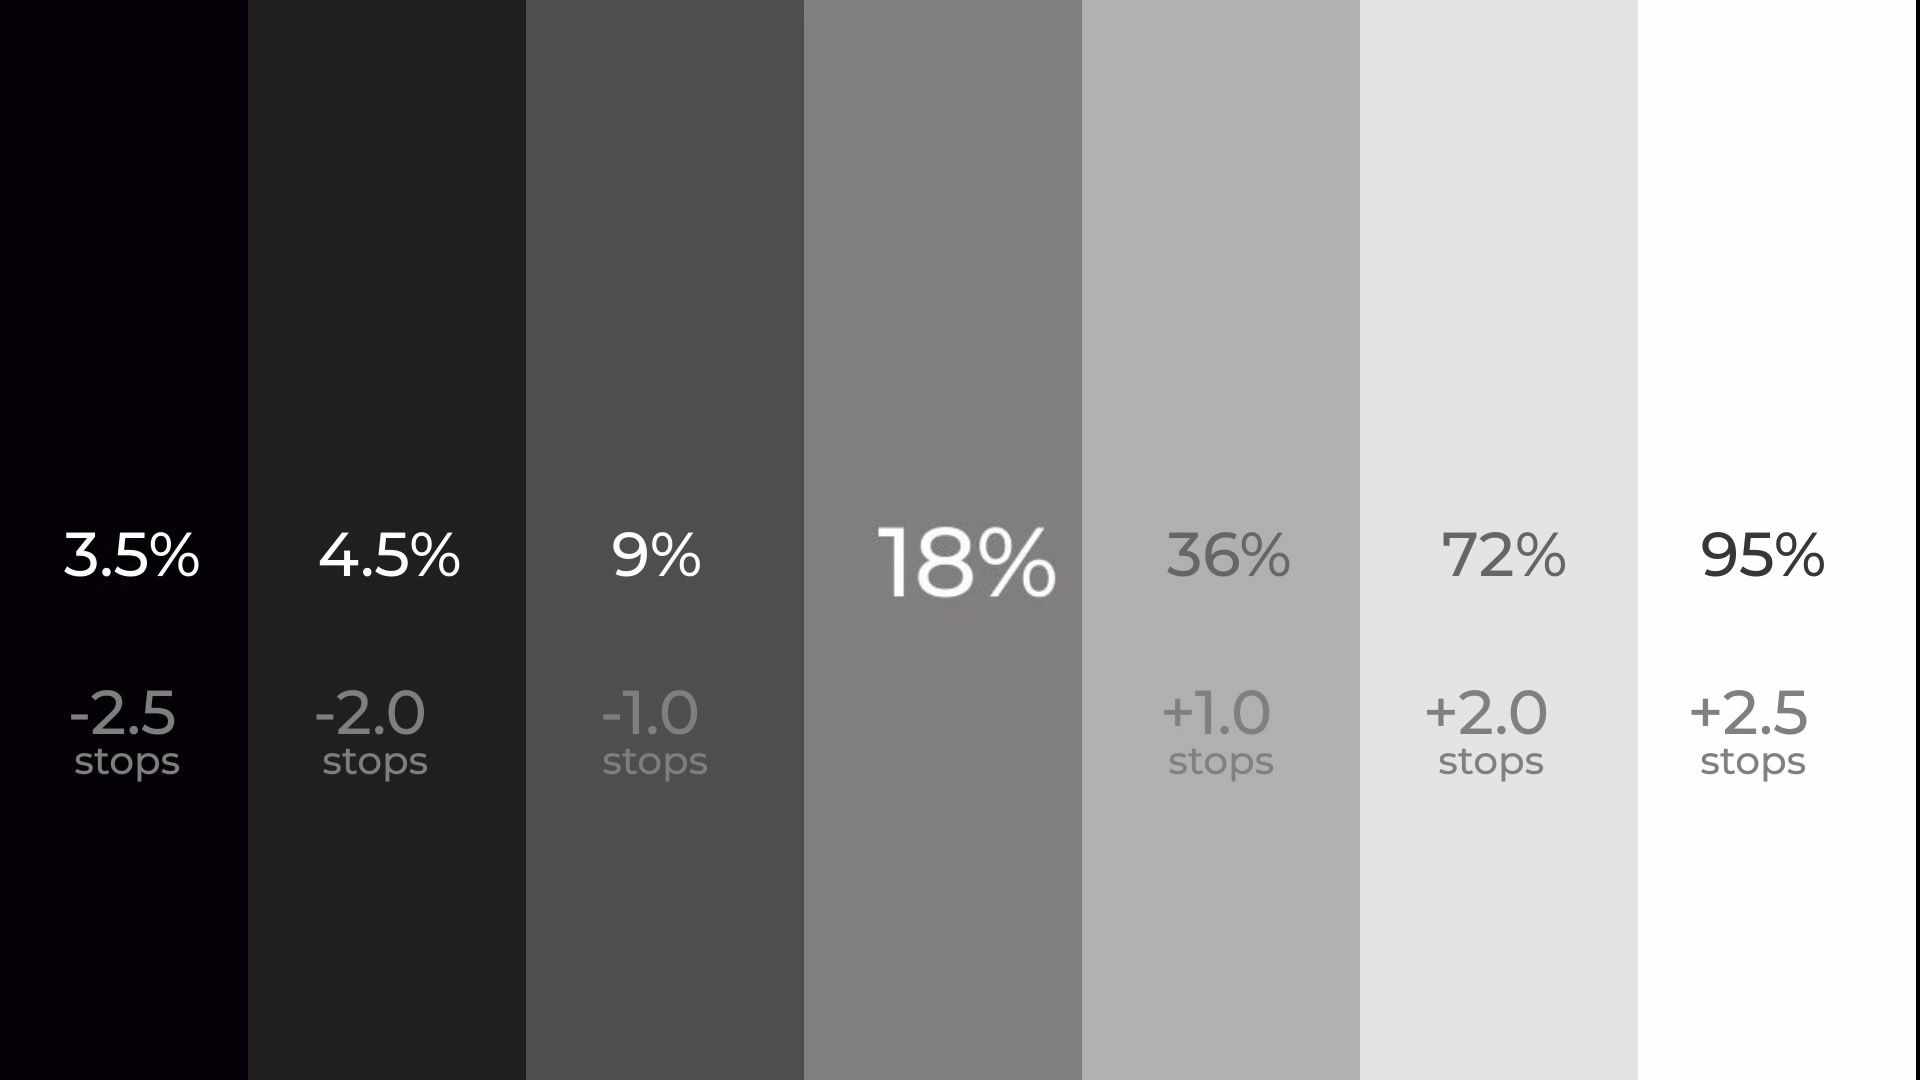
A common situation would be a picture of snow. Unless you intervene, your snow shots will be underexposed and your snow will be “Grayâ€. The solution is to use manual exposure. A good trick to set your exposure in a situation like this is to meter off the back of your hand (if you have average Caucasian skin). And then decrease the exposure by one stop.
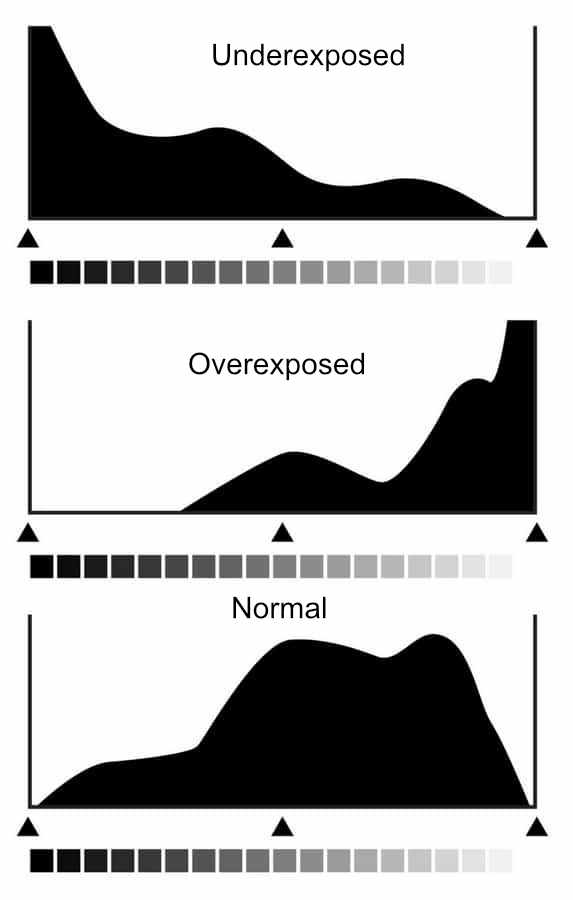
Take a shot and check your histogram (if your camera has that feature). For a snow shot, the tones should all be on the right side of the graph without reaching the very end on the right. If you’re not sure, or you don’t have a histogram, bracket your exposures (make one or two lighter and one or two darker). You could also use a Gray card to set your exposure.
For the Indoor Freelance Photography
For the other situation, you might be taking pictures of an indoor sports event. The lighting inside is even, but if you happen to aim your camera toward the lights your shot will be underexposed (because the camera sees all that light). On the other hand, if you shoot an angle where your camera sees a lot of dark areas (like an unlit area of the stands), then you will overexpose. You solve this by using the manual mode, setting your exposure for the court itself, and then shooting everything at that exposure. (Again you can meter off your skin and increase the exposure by one stop, or just point the camera so it’s only seeing an evenly lit area or use a Gray card and set the exposure.)

In Conclusion
To summarize, use aperture-priority when the depth of field is the most important for your freelance photography. Use shutter-priority when you need to control motion (either freezing it or exaggerating it). And use manual when your camera’s meter is likely to be fooled by the scene. Now go take some pictures! And don’t forget: to achieve the greatest results in your photography, you should practice and practice…